Why
PeopleSoft Security
Why PeopleSoft Security
Peoplesoft is a world-famous client-server application suite based on client-server architecture. Just like any other ER system, Peoplesoft is also based on
backend RDBMS, which can either be Oracle, DB2 etc, based on client
environment.
As Peoplesoft is a reputed HRMS suite, Security is mandatory
, as the data mainly deals with personal information such as SSN, credit card
etc, so there should be sufficient provision of security towards data accesses,
having said that, they should also be able to access the data at the same time
and generate appropriate reports as per user requirements on a “need to know
basis”.
This holds good both in terms of data access provided to the
software developers, as well as to the end-users who will be accessing it.
All users are not exposed of the same access towards the
application and only authorized user have the access to application servers.
The PeopleSoft Internet Architecture falls into the category
of PeopleSoft online security, also referred to as runtime security, which
suggests that only authorized users can hook up with the online and application
servers, and only authorized application servers can hook up with a given
database.
PeopleSoft
Security
Ø The PeopleSoft security approach is tailored specially for
the internet.
Ø Security People Tool enables the provision of security to all of
the users of the PeopleSoft system.
Ø Using the Definition Security People Tool we can restrict
access to the objects developers created in PeopleSoft Application
Designer.
Terms
Used while implementing Peoplesoft Security
USER ID -
Enables access to system.
-
Authenticates, Authorizes.
ROLE
- A named set of work that a
user can do.
- Works in conjunction with Workflow.
- Comprised of “1 or more” Permission Lists.
PERMISSION
LIST - Defines the pages to which the employee
is
Different
types of Security
Sign on and Time-out Security:-
User is asked to enter User ID and a
password on the PeopleSoft Sign on page, when signing into PeopleSoft. For a
valid ID and password, PeopleSoft connects the user to the application and the
system retrieves the appropriate user profile. When a user signs on, they are
connected as long as their sign on time allows and as long as their browser
doesn’t sit idle for longer than their time-out interval is achieved.
Page and Dialog Security:-
Page and
Dialog Security is used for granting access to PeopleSoft menus, Users can be
controlled from accessing the data with the help of People tool Security.
Batch Environment Security:-
For running a
batch Processes from PeopleSoft Process Scheduler, appropriate Process Profile
to the User Profile should be assigned along with proper process groups.
Each batch
program has a run control that we define before we can run the batch program.
Definition Security:-
For
restricting the access of application developers, a separate People tool called
‘Definition Security’ is used , which can be used to govern access to the Record
definitions, Field definitions, but Page definitions as well.
Application Data Security:-
Definition
Security is a type of data security- which can be used to control access to
object definitions in the People tool tables. We can set data permissions at
the following levels:
Ø Query/Table-Level Security:- Query/Table- Level
Security helps us to build SQL queries
to retrieve information from application tables.
Ø Row-Level Security:- Row Security
Permission list is used to define data security to users.
Field Security:- We can restrict
the access to particular fields or columns within our application tables by
using People code.
Basic
Steps for assigning Permission Lists to Roles and Roles to User Profiles
Ø Create Permission Lists
Ø Create Roles
Ø Assign Permission Lists to the Roles
Ø Create User IDs
Ø Assign Roles to User ID’s
Flow
of Security
Permission
Lists
Permission Lists are the building blocks of user security authorization.
Permission lists allow the developer to grant user access not only to
PeopleSoft Pages, but they allow us to grant access to development
environments, sign on time periods, administrative tools, personalizations etc.
as well.
• The fewer Permission Lists used the more modular and
scalable the PS security will be.
• Multiple Permission Lists can be assigned to a single
Navigation: People Tools>Permissions and
Roles>Permission Lists
The different steps involved in working with permission
lists are:-
Ø Create a new permission list.
Ø Copy permission lists.
Ø Delete permission lists.
To create a new permission list:-
Ø Select People Tools, Security, Permissions & Roles,
Permission Lists.
Ø On the search page click Add a New Value.
Ø In the Permission List edit box, enter the name of
Permission List you want to create.
Ø From the pages in the Permission List component, select the
appropriate permissions.
Ø Save your work.
Copying Permission Lists:-
Ø Select People Tools, Security, Permissions & Roles, Copy
Permission Lists.
Ø In the search page, search for the Permission List that you
want to copy, and click it.
Ø On the Permission List Save As page, enter a new name in the
to: edit box for the Permission List that you want to copy.
Ø Click Save.
Deleting Permission Lists:-
Ø Select People Tools, Security, Permissions & Roles,
Delete Permission Lists.
Ø On the search page, locate the Permission List that you want
to delete and click it.
Ø The Delete Permission List page appears.
Ø Click Delete Permission List.
Ø Click OK to confirm the deletion, or click Cancel to end
without deleting
Permission Lists – General page
PeopleSoft Navigation for managing General information of a
Permission List
Permission Lists – Pages page
PeopleSoft Navigation for managing General information of a
Permission List
Permission Lists –Pages–Edit Components
PeopleSoft Navigation for managing accesses of a
Permission List to specific Pages, and ability of a user to edit them
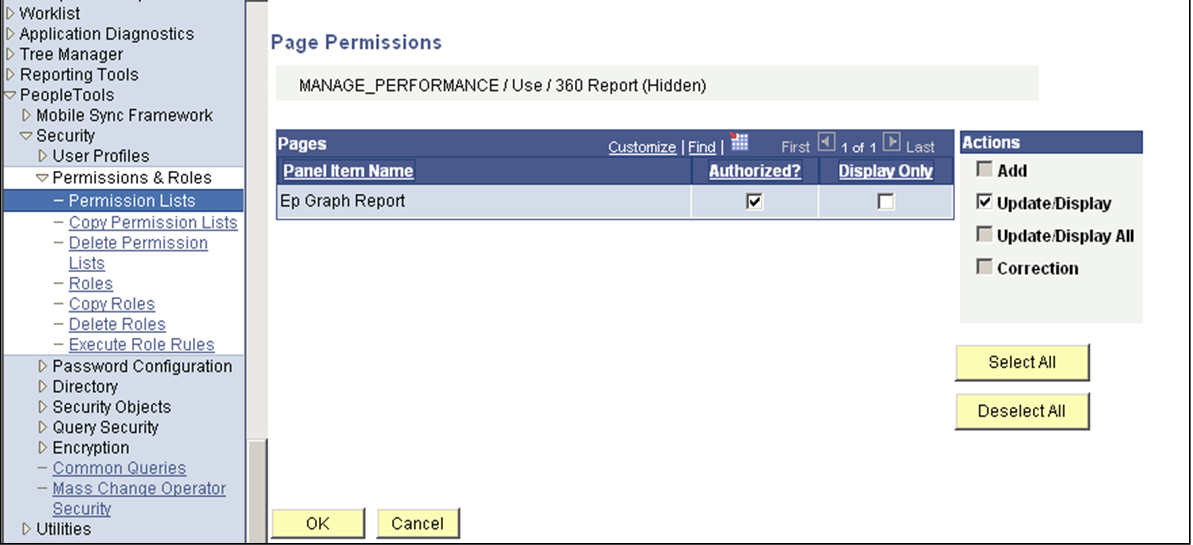
Permission Lists– Pages – Page Permissions
PeopleSoft Navigation for managing additional accesses
of a Permission List to specific Pages
Permission Lists – People Tools page
PeopleSoft Navigation for managing accesses of a Permission
List to specific Peopletool objects
Permission Lists – Queries page
PeopleSoft Navigation for managing accesses of a Permission
List to specific Peopletool objects
Sign-on Times
Peoplesoft can also inhibit users to perform sign on, on the
basis of date time condition
Roles
• Roles are assigned to User Profiles
and they are the intermediate objects that link User Profiles to Permission
Lists
• Multiple roles can be assigned to a
single User Profile. Examples: Applicant, Employee, Vendor, Accounts Payable
Clerk, and Manager
• Roles allow you to mix and match
access to your PeopleSoft system and can be assigned to User Profiles manually
or dynamically.
Navigation: People Tools>Permissions
and Roles>Roles
There are three steps for working with roles. They are:-
ØCreate a new Role
Ø Copy a role.
Ø Delete a role.
Creating a New Role:-
ØSelect People Tools, Security, Permissions & Roles,
Roles.
Ø On the search page click add a New Value.
Ø In the Role Name edit box, enter the name of role you want
to create, and click Add.
Ø From the pages in the Roles component select the appropriate
role options.
Ø Save your work.
Copying Roles:-
Ø Select People Tools, Security, Permissions & Roles, Copy
Roles.
Ø On the search page, search for the role that you want to
copy (clone), and click it.
Ø The Role Save as page appears.
Ø On the Role Save As page, enter a new name in the as: edit
box.
Ø Click Save.
Deleting Roles:-
Ø Select People Tools, Security, Permissions & Roles,
Delete Roles.
Ø On the search page, locate the Permission List that you want
to delete and click it.
Ø The Delete Permission List page appears.
Ø Click Delete Permission List.
Ø Click OK to confirm the deletion, or click Cancel to abort.
Roles – General
Peoplesoft Navigation for managing general information of
Roles
Roles – Assign Permission Lists
Peoplesoft Navigation for managing Permission List
information for Roles
Roles – Members
Peoplesoft navigation which gives information of all the
User IDs which are assigned to the specific Role
Roles – Workflow
Peoplesoft navigation for managing the Workflow information
Roles – Queries
Navigation gives cumulative information about the Roles.
User
Profiles
Ø
Users are
assigned with collection of roles which defines the individual users of your
PeopleSoft system
Ø
Set of
data describing a particular user of your PeopleSoft system
Ø
Information
about the user such as e-mail address, language code, and password
Ø
Assign
process profiles, row-level security or business unit security at the User
Profile level
Ø User Profiles are linked to Roles to grant access to
specific areas within the PeopleSoft application
Navigation: People Tools>User Profiles>User Profiles
Working with User Profiles:-
Ø Create a new User Profile.
Ø Copy a User Profile.
Ø Delete a User Profile.
Creating a New User Profile:-
Ø Select People Tools, Security, User
Profiles, User Profiles.
Ø On the Find Existing Values page, click
Add a New Value.
Ø On the Add a New Value page, enter the
new User ID in the User ID edit box, and click Add.
Ø The User ID can contain up to 30
characters. The name you use can't contain a comma (,) or space. Also, you
can't create a User ID named PPLSOFT; this ID is a reserved user ID used within
People Tools.
Ø Specify the appropriate values from the
pages in the User Profiles component, and click Save.
Copying a User Profile:
Ø Select People Tools, Security, User Profiles, Copy User
Profiles.
Ø On the Find an Existing Value search page, select the User
ID you want to clone.
Ø On the User Profile Save As page, enter the New User ID,
description, and the password that the new user ID should use to sign on to the
system.
Deleting a User Profile:-
Ø Select People Tools, Security, User Profiles, Delete User
Profiles.
Ø On the Delete User Profile page, make sure you have selected
the correct user profile.
Ø Click Delete User Profile.
User Profiles – General
Peoplesoft navigation where User is assigned with Permission
List
User Profiles – Roles
Peoplesoft navigation where User is assigned with specific
Roles
User Profiles – Audits
Navigation gives the information on Audit.
User Profiles – User ID Queries
Navigation gives cumulative information about the User ID.
Authorization
IDs
The
PeopleSoft System uses various authorization ID’s and passwords to control user
access to the system.
User IDs:-
A
PeopleSoft User ID is the ID you enter at the PeopleSoft sign on dialog box.
Using People Tools Security, you assign each PeopleSoft user a User ID and
password. The combination of these two items grants users online access to the
PeopleSoft system. The system can also use a User ID stored within an LDAP
directory server.
The
User ID is the key used to distinctly identify the User Profile definition.
Connect IDs:-
People
Tools offers a connectivity feature called Connect ID. Initial connection to
the database is performed by Connect ID. A Connect ID is a valid user ID that,
when used during login, takes the place of PeopleSoft User IDs for the logon
process. We don’t have to create a new database user for every PeopleSoft user
you add to the system.
Connect ID is required for a direct connection (two-tier
connection) to the database.
Access IDs:-
The
PeopleSoft Access ID is the RDBMS ID with which PeopleSoft applications are
ultimately connected to the database after the PeopleSoft system gets connects.
An Access ID typically has administrator-level database
access; that is, it has all the RDBMS privileges necessary to access and
manipulate data for an entire PeopleSoft application. The Access ID should have
SELECT, UPDATE, and DELETE access.
It's important to understand that users do not know their
corresponding Access ID. They just sign on with their User ID and password
and—behind the scenes—the system logs them onto the database using the Access
ID.
Access Profiles are used in the following situations only:
when an application server connects to the database, when a windows workstation
connects directly to the database, and when a batch job connects directly to
the database.
Access Profiles are not used when end users access the
applications through PIA.
Symbolic IDs:-
The
Symbolic ID acts as an intermediary entity between the User ID and the Access
ID.
All the User IDs are associated with a Symbolic ID, which in
turn is associated with an Access ID.
when the Access ID needs to be retrieved or referenced, the
query selects the appropriate Access ID by using the Symbolic ID as a search
key.
PeopleSoft
Security Tables
Different tables that are involved in PeopleSoft Security are:-
Ø PSROLECLASS: Role Classes
table. A many to many relationship table between Roles and Permission Lists.
Ø PSROLEDEFN: This table
stores information about PeopleSoft Role definitions. Users get permissions to
PeopleSoft objects through Roles, which are assigned Permission Lists.
Ø PSROLEUSER: This table
stores information about the Users in PeopleSoft and the roles assigned to
them.
Ø PSCLASSDEFN: Permissions
List definitions table. Permission list name can be found under Field Name
CLASSID.
Ø PSOPRDEFN:
Users/Operator definition table. This table stores information about PeopleSoft
users. This is the core table for User Profile Manager.